Cloth Masks: What You Should Know and How To Make Your Own! (Tutorial)
- Category: Coronavirus
- Posted On:
- Written By: Baton Rouge General

As we’ve learned more about COVID-19 and how it spreads, we’ve learned that wearing masks is an important part of reducing your risk of contracting the virus. Depending on the type of interaction, physicians and caregivers are required to wear surgical, procedural or N-95 masks during encounters with patients. Those types of masks aren’t easy to find and should be reserved for the healthcare workers who are face-to-face with patients each day. So what should the rest of us do?
How Wearing Cloth Masks Can Help Protect Against the Spread of COVID-19
If worn correctly, cloth masks can reduce your risk of catching COVID, or other viruses, or spreading them to others. Some people have COVID-19 without symptoms, so it’s recommended that everyone wear a mask in public right now to help stop the spread of the disease. At the same time, it’s important to remember that masks are not meant to take the place of proper social distancing and patient care. They simply add another layer of protection in the fight against infection.
Plus, they’re really cute!
Making Cloth Masks
We've heard from lots of people in the community who would like to help make cloth masks for our staff and patients, and we would love your support. If you’d like to learn how to make masks for your own personal use or sew a bunch for your local hospitals, here's a simple, time-saving tutorial created by none other than our favorite Gift Shop Manager, Shelley Nydegger.
What you need:
- Printable mask pattern (craftpassion.com)
- 13 x 7" cotton fabric, prewashed
- 12 x 7" lining fabric (cotton or flannel), prewashed
- 6" metal wire or pipe cleaner for nosewire (optional)*
- 16" Elastic cord for earloops (or 44" shoelace, ribbon or cord to make head tie)
- Sewing essential
- Sewing machine
- Iron
Putting it all together:
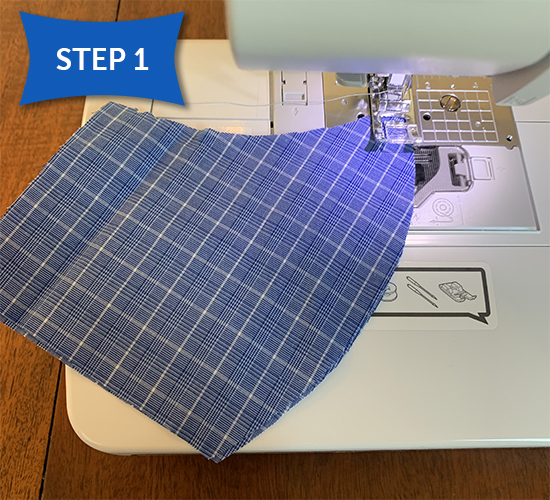
Turn the face mask main fabric piece with right sides together and sew centerline.
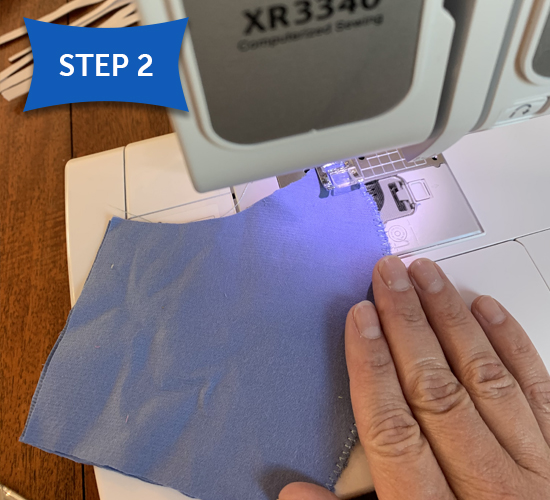
Repeat Step 1 with the lining fabric pieces
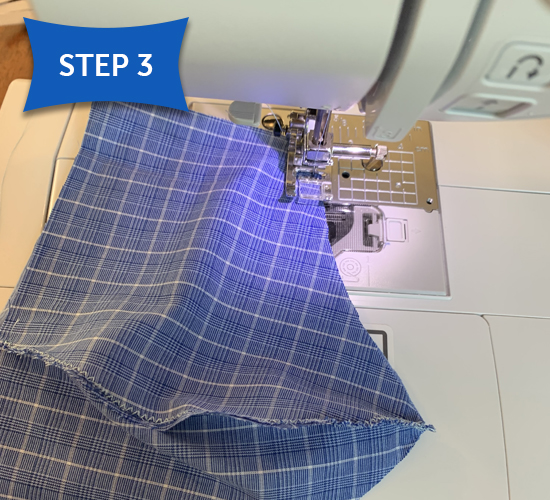
Put right side of main fabric and lining together and sew the top and bottom together
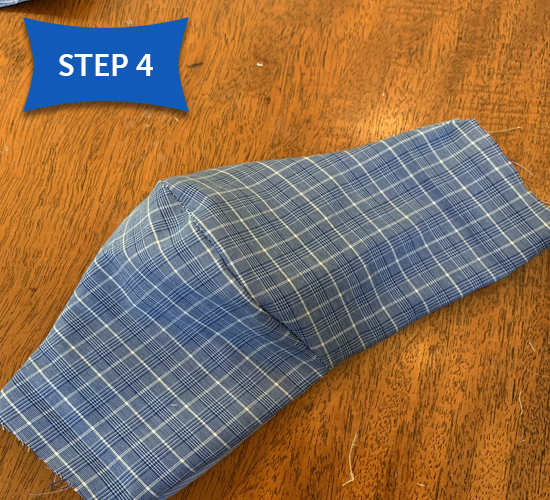
Turn right side out and press with iron.
*If including the nosewire, sew a seam across the top just wide enough to slide wire or piper cleaner through. This step will help mask fit snug against the face.
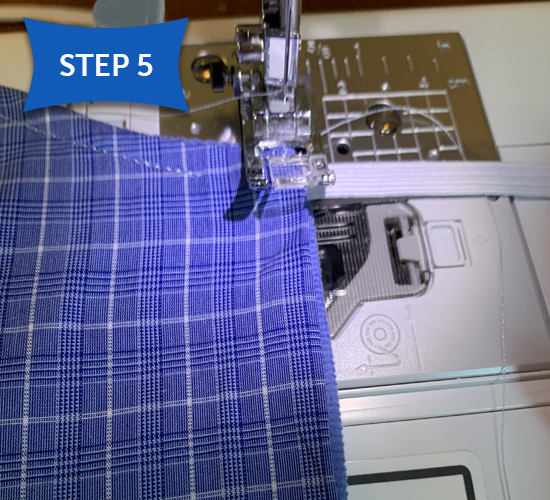
Fold in raw edges, slip ends of elastic to the top and bottom of each end and finish seam with a zig zag stitch
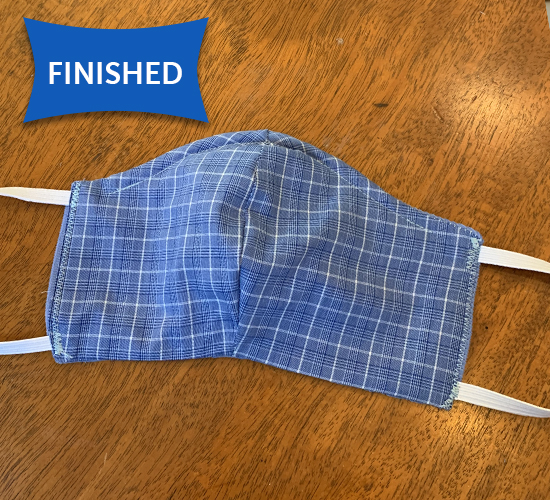
And voila! Your mask is complete.
Remember, laundering these masks is just as important as wearing them to prevent the spread of disease. If you are using a reusable cloth mask, at the end of the day, take the mask off from the straps (not touching the front). Wash it in the washing machine with hot water and completely dry on medium or high heat.